by Gabrielle Botbol
About the author
Gabrielle Botbol is a pentester, cyber security blogger, and podcaster CS by GB - Cybersecurity By Gabrielle B
She created a self study program to become a pentester.
Gabrielle Botbol focuses her efforts on democratizing information security for all.
She is a board member of Ecole Cyber in Montreal.
She was honored for her contributions to the cyber community by being named one of the top 20 women in cyber security in Canada in 2020 and in 2021 Pentest Ninja by Women’s Society of Cyberjutsu.
She is mindful of the immense work that needs to be done to protect our privacy, our economy, our democracy, and our sovereignty. Her mantra is “Action for Cyber Peace”. Building it a little bit every day.
Introduction
Mobile pentesting is part of the pentester's testing routine. However, it is not widely documented. In the life of a pentester, at one time or another, we have to conduct mobile pentests because the needs are getting bigger. This article deals with an essential part: how to do a setup to test Android applications. I will also present the process of pentesting an Android application and give some practical examples.
Note
This article will not cover certificate pinning, however, you will find in the resources a few links about the subject.
The Android application I used for the examples is PIVAA, a willingly vulnerable application. You can get it here and hack it; it was made for this purpose :D https://github.com/htbridge/pivaa
All the installs and setups were made on Ubuntu.
How to set up the lab
In order to set up the lab, we will need to install the following tools:
- JADX-GUI
- adb
- Android Studio
- BurpSuite (Community edition works fine)
How to install JADX
In order to install JADX, you need to make sure you have Java installed. If not, you can install it with:
sudo apt install default-jdk
|
Once this is done, you can install JADX using this command:
sudo apt install jadx
|
Finally, you can launch it using (jadx-gui binary is located here: jadx/bin):
./jadx-gui
|
For more information on jadx or the installation instructions for other systems, check out this link: https://github.com/skylot/jadx
How to install adb
To install adb you just need to do:
sudo apt-get install adb
|
The developers Documentation on adb is complete, check it out here: https://developer.android.com/studio/command-line/adb
For installation instructions on other systems, check out this link: https://www.xda-developers.com/install-adb-windows-macos-linux/
How to install Android Studio
Android Studio’s installation is pretty straightforward ;
- Go to this link: https://developer.android.com/studio
- Click on download (it should be appropriate to your OS)
Then you should be good to go!
How to setup an emulator on Android Studio
In order to set up an emulator, you need to:
- Go to AVD Manager:

- Click on “Create Virtual Device”
- Choose a phone you like:
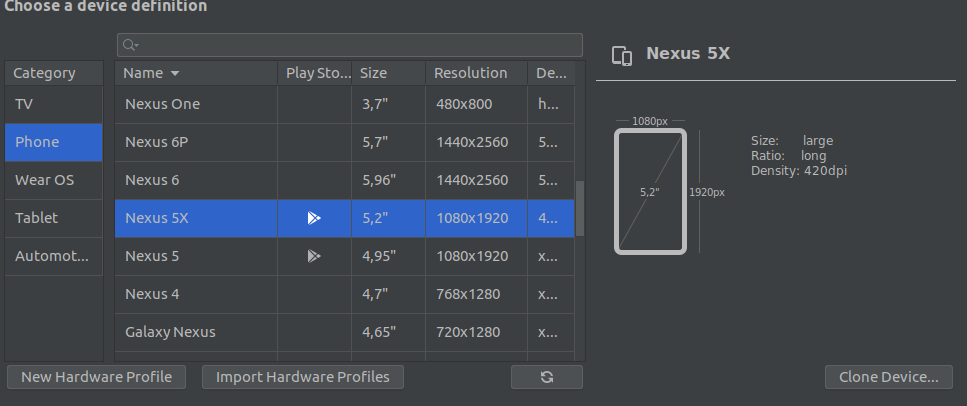
- Click on next and in the next screen click on x86 Images.
- Choose an image with an API Level adapted to the application you are going to test (I am going to use API 26 for this example).You might need to Download the image first and make sure it has Google APIs specified.

- Once downloaded, you can select it and click next and then finish.
For now, you will be able to launch it using the start button: ![]()
How to install BurpSuite
As for Android Studio, to install BurpSuite (Community edition), you just need to go to this link: https://portswigger.net/burp/releases/professional-community-2021-12-1?requestededition=community and get the proper version for your operating system.
How to setup BurpSuite with the emulator
In order to intercept the request with BurpSuite, we have some setup to do.
In BurpSuite, we need to download the certificate:
- Go to the Proxy tab then click on Options
- Click on the Import / Export CA certificate button
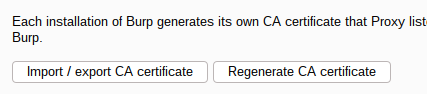
- Check the Certificate in DER format option then click on Next
- Choose a file with the Select file ... button and rename it as you wish but change the extension to “.cer”.
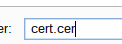
The certificate is now exported in the folder you have chosen and you should see the message:![]()
Now we have to drag and drop it in the emulator. Once it is copied, we have to set in the emulator. Note that I am using a Nexus 5 with API 23 the process might differ with another emulator.
- Go to Settings> Security
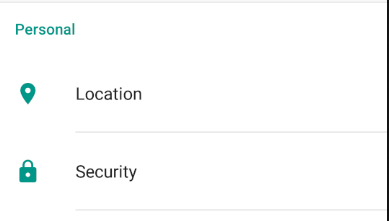
- Click on Install from SD card:
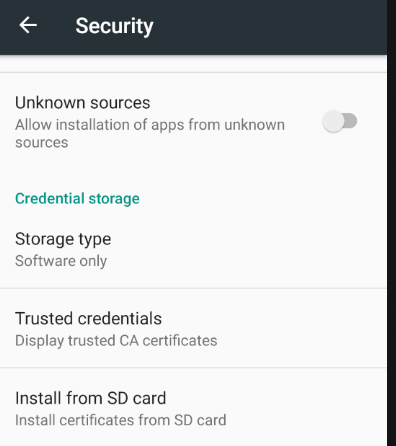
- The certificate should be in Internal storage > Download. Double click on it:
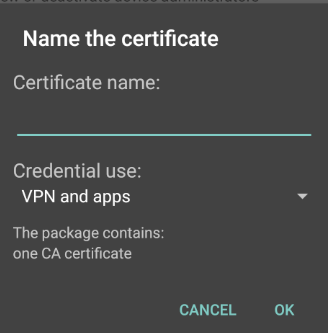
- Name it and click OK.
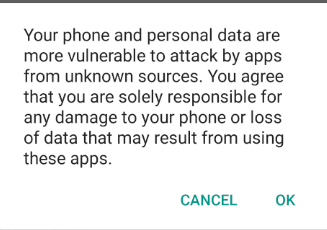
- It is going to ask you to set a lock screen PIN code; click OK and proceed. I usually do not set a PIN to start the device
- Type and confirm your PIN. It should say that the certificate is installed.
- Accept the warning by clicking OK.
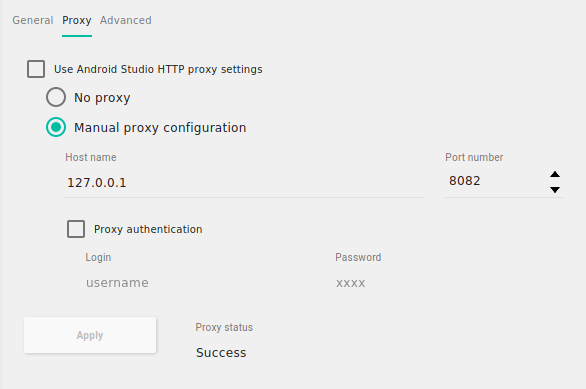
Now we have to set up the proxy settings of the emulator.
- Click the three dots on the side of the emulator:
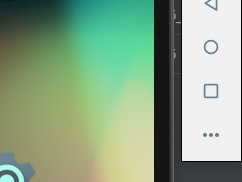
- Go to Settings on the Proxy tab and make the following setup by clicking Apply:
Now we have to go on Burp:
- Within the Proxy tab, click on the Options subtab and in the Proxy Listeners section, click on the Add button, and set it up as follows:
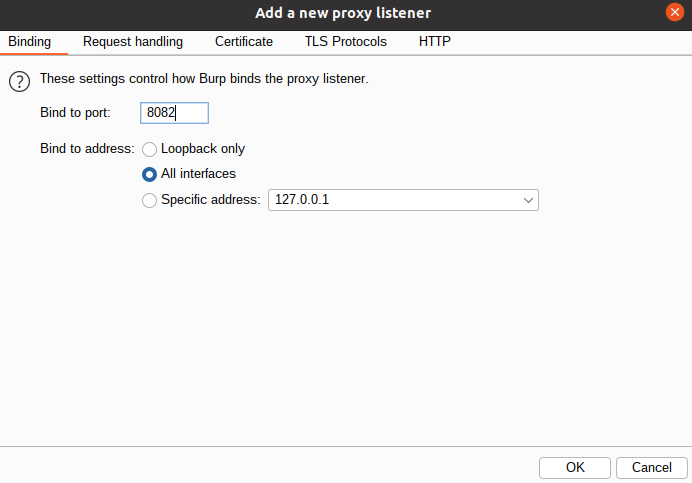
And then click OK and Yes.
Your table of proxy listeners should look like this: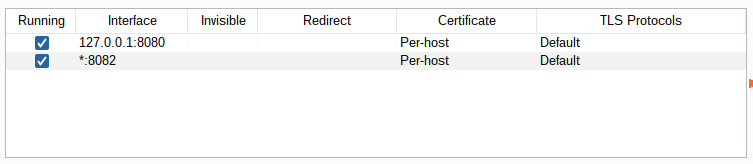
Now that the installation and configuration are done, we can dive into the pentest process.
Usual process for Android application pentest
I am not going to cover the reconnaissance phase as it is similar to many other pentest types.
So once you have done the reconnaissance phase, you can start to dive in to your application pentest.
The other steps are: Static Analysis, Dynamic Analysis and, of course, the report.
Static Analysis
To process the static analysis, we are going to use jadx-gui.
Once you have launched JADX, you will be greeted with this window: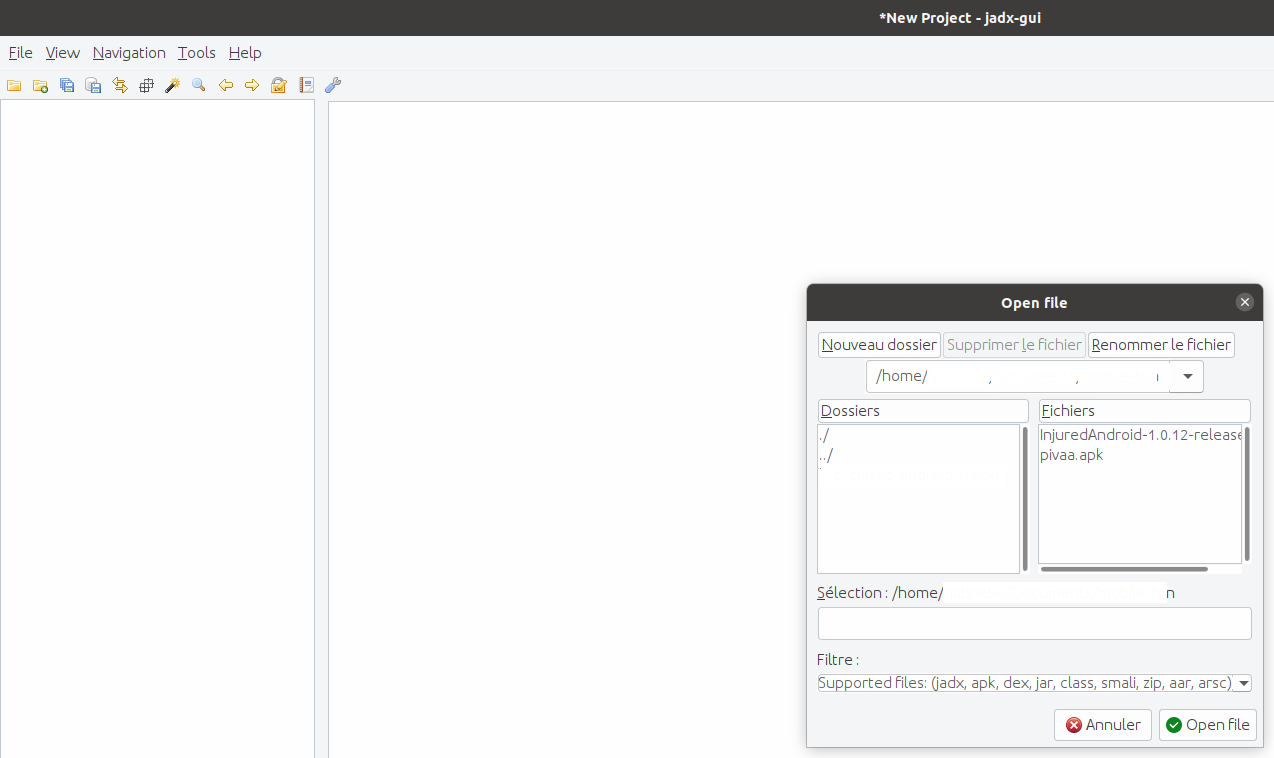
Choose the desired APK (in our case, pivaa.apk) and click on Open File.
You will then be able to navigate in the source code: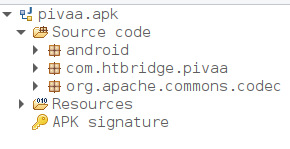
The Android XML manifest
An interesting file to check is AndroidManifest.xml. You can find it here: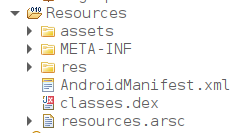
This file is the place where the developers will describe essential information about the application. As stated in the Android’s developer documentation:
“Every application project must have an AndroidManifest.xml file (with precisely that name) at the root of the project source set. The manifest file describes essential information about your application to the Android build tools, the Android operating system, and Google Play.” (reference: https://developer.android.com/guide/topics/manifest/manifest-intro)
This will be used to mention the application package’s name, its components, the permissions, and the hardware and software this application needs.
Note that it is also useful to check out which API we need to test the application by having a look at the minSDKVersion attribute (see within the manifest).
In PIVAA for example you can see here all the permissions required by the application:
<uses-permission android:name="android.permission.GET_ACCOUNTS"/> |
As the goal of the permission is to protect the privacy of the user, you might see some permissions here that should not be allowed, depending, of course, on the purpose of the application. The full list of permissions is available online. https://developer.android.com/reference/android/Manifest.permission
Allow backup
The allowBackup flag could allow an attacker to take the backup of the application’s data with adb. So it would be safer to put it as false, and beware that, as mentioned in the OWASP documentation, if this attribute is not explicitly set up, it is enabled by default! (https://github.com/OWASP/owasp-mstg/blob/8d67a609ecd095d1bb00aa6a3e211791af5642e8/Document/0x05d-Testing-Data-Storage.md#static-analysis-7).
In our example on PIVAA it is set to true:
android:allowBackup="true"
|
Debuggable
This flag will mention if the application can be debugged. It should be set to false, otherwise an attacker could use it to access the application data. Be aware that sometimes your customer will give you the developer version of the application, so this flag will be set to true. What I usually do in this case is that I mention it as informational as a reminder for the customer to make sure that they will change this when they deliver the application in production.
In our example on PIVAA, this is set up to true:
android:debuggable="true"
|
OWASP provides useful documentation about this topic. [Cite here]
Which activities are exportable
The Activities are the screens of the applications. Depending on the application and the activity some of them should not be exportable because this means that they could be accessed from the outside of the application. So we will need to check if these specific exportable activities disclose sensitive data.
In our example, three activities are exportable:
<service android:name="com.htbridge.pivaa.handlers.VulnerableService" android:protectionLevel="dangerous" android:enabled="true" android:exported="true"/> |
General tips
Other than what we just saw, here are some general tips on what to look for during static analysis.
- It is also worth checking the Strings.xml file
- We can also try to enumerate a database (there is even a tool for this: Firebase Enum https://github.com/Sambal0x/firebaseEnum)
- Enumerate public resources in cloud (see this tool here: Cloud Enum https://github.com/initstring/cloud_enum)
- Lookup for secret keys, credentials, comments, URLs, IP address, private keys, any sensitive information that should not be in the code.
With JADX-GUI you can also use the global search to lookup for specific strings, for example: API, API_KEY, pass, key, ClientId, ClientSecret, id, AWS, Secret, username, firebase.io, http, https, SQL (and extensions for sql file like .db, .sqlite, etc).
Here is how to do this:
- Click on this little button on the top left:

- Type the String you are looking for:
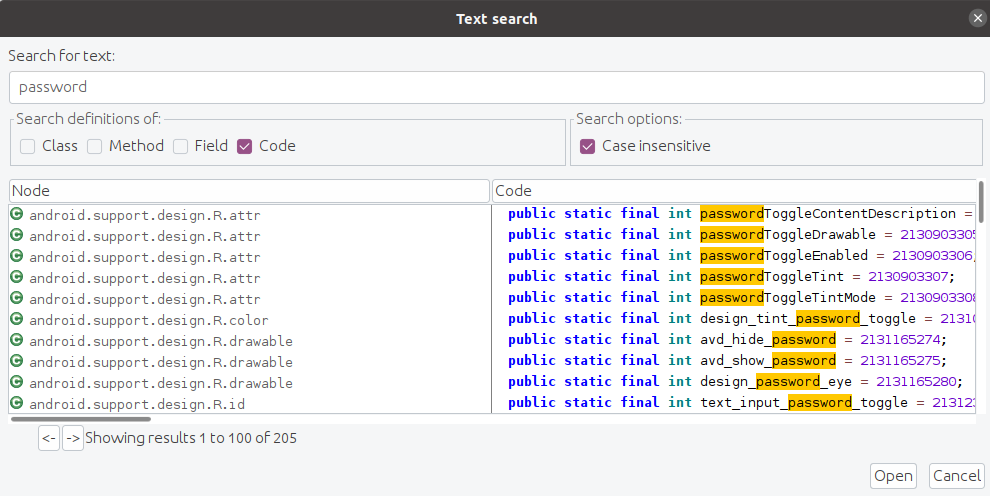
- Check out the results!
In our example in PIVAA, we are able to find the database using this trick (we could also have checked the data/data directory right away, this is one of the thing we should do during an Android application pentest anyway):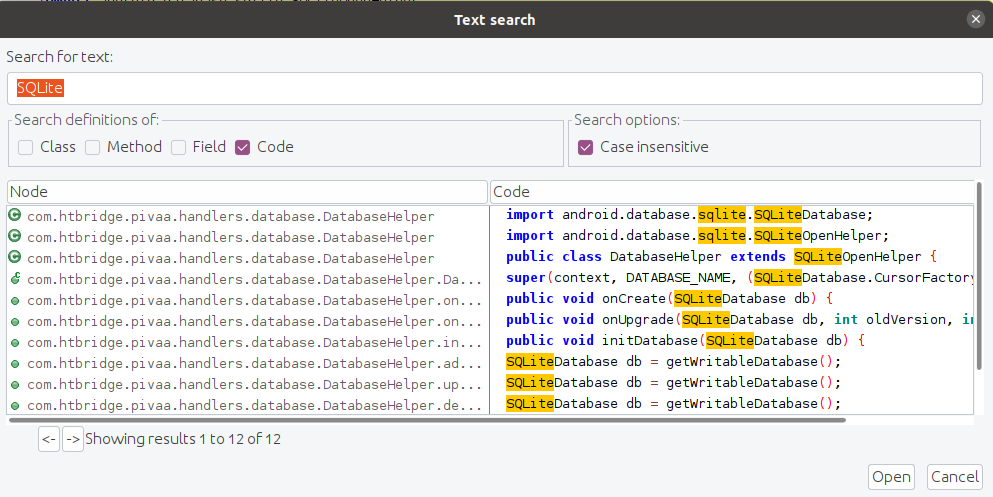
So now we know that we have a class called DatabaseHelper.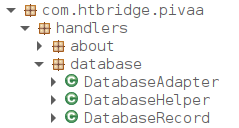
So the next step here would be to find this database in the emulator.
We can look for this either using adb shell or just by checking the data folder in the Device File Explorer on Android Studio and we can find our databases here:
(data/data/com.htbridge.pivaa/databases):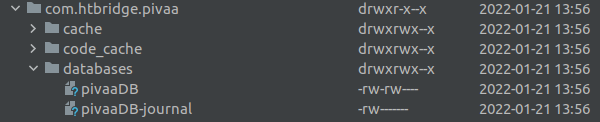
So now we just have to pull the files using adb:
user ~/folder/mobile $ adb pull /data/data/com.htbridge.pivaa/databases/pivaaDB |
We can use SQLiteBrowser to read it (install it with sudo apt install sqlitebrowser):
user ~/folder/mobile $ sqlitebrowser pivaaDB
|
And we can see the data and the tables:

In general, databases file are useful to check for Insecure Data Storage (see here for more information on this: https://owasp.org/www-project-mobile-top-10/2014-risks/m2-insecure-data-storage)
In our example, this is a vulnerability for the following reason:
“The mobile application uses an unencrypted SQLite database. This database can be accessed by an attacker with physical access to the mobile device or a malicious application with root access to the device. The application should not store sensitive information in clear text.” (PIVAA documentation: https://github.com/HTBridge/pivaa#cleartext-sqlite-database)
For more information on static analysis, checkout hacktricks: https://book.hacktricks.xyz/mobile-apps-pentesting/android-app-pentesting#static-analysis
Dynamic Analysis
Once you are all set up with Burp following the setup process I showed earlier you can start the dynamic analysis.
General tips
Here are some of the things you can check:
- Are screens visible with screen capture and instance captures when you visit them with sensitive data in it?
- Tapjacking
- And all the usual Web application vulnerabilities (OWASP Top 10)
For more informations on the dynamic analysis you can check the following links:
Example of vulnerability
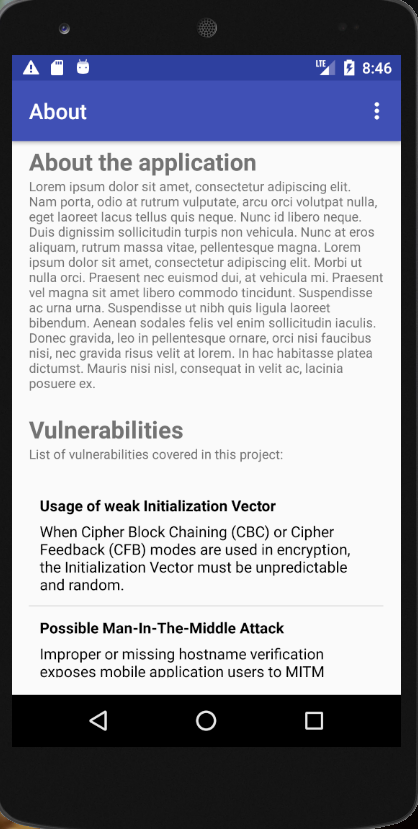
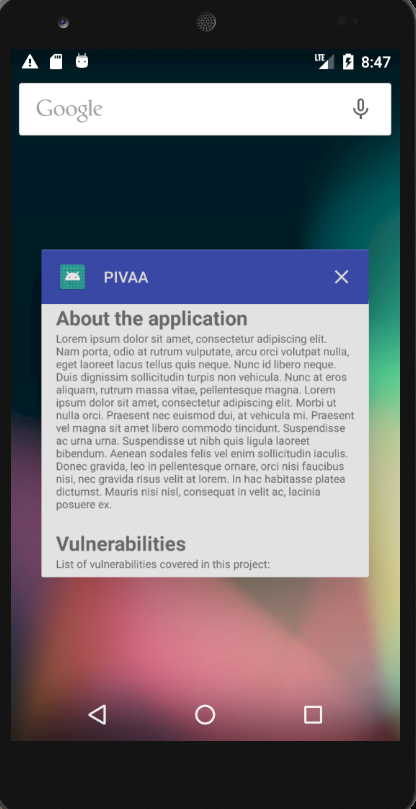
In the application you are testing, go in a screen in which you have sensitive data (for the demo, it is not going to be the case but let us just assume it for the example). In PIVAA, I am going to use the About the Application page.
When you use another application or click on the Home button, the application you are currently using is sent to the background. If you were looking at a screen with sensitive data and if it shows when you check the list of backgrounded applications, it is a vulnerability you have to report.
Here is how it looks:
- Here I am using the application:
- I click on the Home button to check something else on the phone
- If I check the backgrounded application, I can see that PIVAA has kept a capture of the page I was currently looking at in the background:

This should not happen if the screen contains sensitive data. An additional check can be made in the static analysis step of the process by checking if the FLAG_SECURE is set (see here for more info: https://github.com/OWASP/owasp-mstg/blob/master/Document/0x05d-Testing-Data-Storage.md#static-analysis-8).
How to report what you find
Structure of a pentest report
Here is what a pentest report should look like: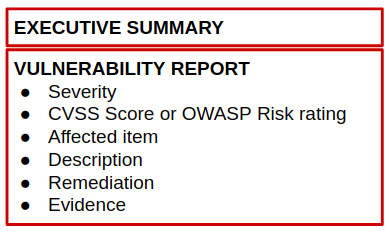
Executive summary
The executive summary is the part addressed to the executive of the company who will read the report. It needs to be high-level explanations with no technical detail. It contains a global posture that explains why the findings and attack combination could impact the company.
Vulnerability report
The vulnerability report will have all the elements you see on the picture above.
- Severity: The severity is usually in one word: low, medium, high or critical.
- Score: The CVSS Score or OWASP risk rating score. This can be calculated with dedicated online tools (https://www.first.org/cvss/calculator/3.0 or https://www.owasp-risk-rating.com/).
- Affected item: The detailed description of the affected item.
- Description: A detailed description with technical details on how the flaw can be reproduced.
- Remediation: An explanation on how to correct it.
- Evidence: A screen capture and/or request and/or response as evidence of the exploitation that you were able to conduct (during the attack phase, you should have taken as many notes as possible along with screenshots and request/response from Burp, anything useful to prove the vulnerabilities and allow the person who will read your report to reproduce the exploit).
Example of a vulnerability report part
Let’s see the vulnerability report part more precisely with the example.
- Information disclosure through backgrounded screens of the application
Severity: Low
CVSS:3.1/AV:L/AC:L/PR:N/UI:R/S:U/C:L/I:N/A:N
Description
In order to provide visual transitions in the interface, Android records a screenshot of the current application screen. This happens when an application is suspended, when the button that leads to the main menu is pressed, when receiving a call, or any other event that may interrupt the application. These captures can contain user information or other sensitive data.
Also, the application does not leverage the FLAG_SECURE setting to protect sensitive data that should be leaked.
This way, the attack surface of the mobile application is expanded. Confidential information can be persisted on the mobile device through this mechanism.
Remediation
Using the FLAG_SECURE setting in screens with sensitive data will prevent their contents from being in backgrounded screenshots.
Evidence
- Sensitive data shown in the backgrounded application:
Thanks for reading, I hope you enjoyed this article.
Resources
- OWASP MSTG: https://github.com/OWASP/owasp-mstg/
- Mobile Hacking crash Course on Hackerone https://www.hacker101.com/sessions/mobile_crash_course
- Vulnerable applications to practice on:
- Nahamsec Beginner Bounty hunters Mobile Hacking: https://github.com/nahamsec/Resources-for-Beginner-Bug-Bounty-Hunters/blob/master/assets/mobile.md
- Nahamsec tools for mobile hacking: https://github.com/nahamsec/Resources-for-Beginner-Bug-Bounty-Hunters/blob/master/assets/tools.md#Mobile-Hacking
- Android Hackerone disclosed reports and other resources: https://github.com/B3nac/Android-Reports-and-Resources
- ExploitMe Mobile Android Labs: https://securitycompass.github.io/AndroidLabs/setup.html
- Hackthebox Track: Introduction to Android Exploitation: https://app.hackthebox.com/tracks/Introduction-to-Android-Exploitation
- TCM Security Academy, Course Mobile App Pentesting (29,99 US$) https://academy.tcm-sec.com/p/mobile-application-penetration-testing
- Qark: https://github.com/linkedin/qark
- MOBSF: https://mobsf.github.io/docs/#/